A couple tips to avoid issues when updating your Hippotizer software.
We typically refer to updating as a clean installation of a newer feature release. This involves removing any older version before the update and then installing the release ie 4.3.x to 4.4.x. Upgrading Hippotizer is referred to as going to a newer version of the same feature release ie 4.3.0 to 4.3.3.
To update Hippotizer
1. Download the new version you want to install and be sure to unblock the file.
A video on this is here.
2. Make a backup of all of your components in case you want to go back to this version later.
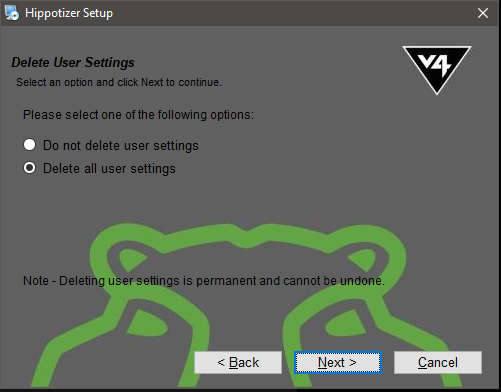
3. Uninstall the previous version choosing to delete all settings. This needs to be done if you are going to a feature release from another feature release version ie 4.3.x to 4.4.x.
4. Stop the Fan Controller and LED Manager Services (depending on the version, they may already be stopped). A video on this here.
5. Install the newer version choosing to uninstall the older settings or delete the older settings.
***If you have restored your Hippotizer using factory restore, you may have a really early version that requires steps to these listed above. If you are on versions earlier up to and including 4.2 for example, you will also need to manually delete the C:\HippotizerV4 and C:\Hippotools folders.
To upgrade Hippotizer
1. Download the new version you want to install and be sure to unblock the file.
A video on this is here.
2. Make a backup of all of your components in case you want to go back to this version later.
3. Run the new installer. Be sure that you are already on the same feature release version and upgrading the software to a newer service release is generally fine ie 4.3.0 to 4.3.3 programming wise but it is always a good idea to have a backup of your show and or components!


Ned Steele
Comments